Saturday 22 February 2014

Crafters Companion ..........Love and Romance


Congratulations your engaged.
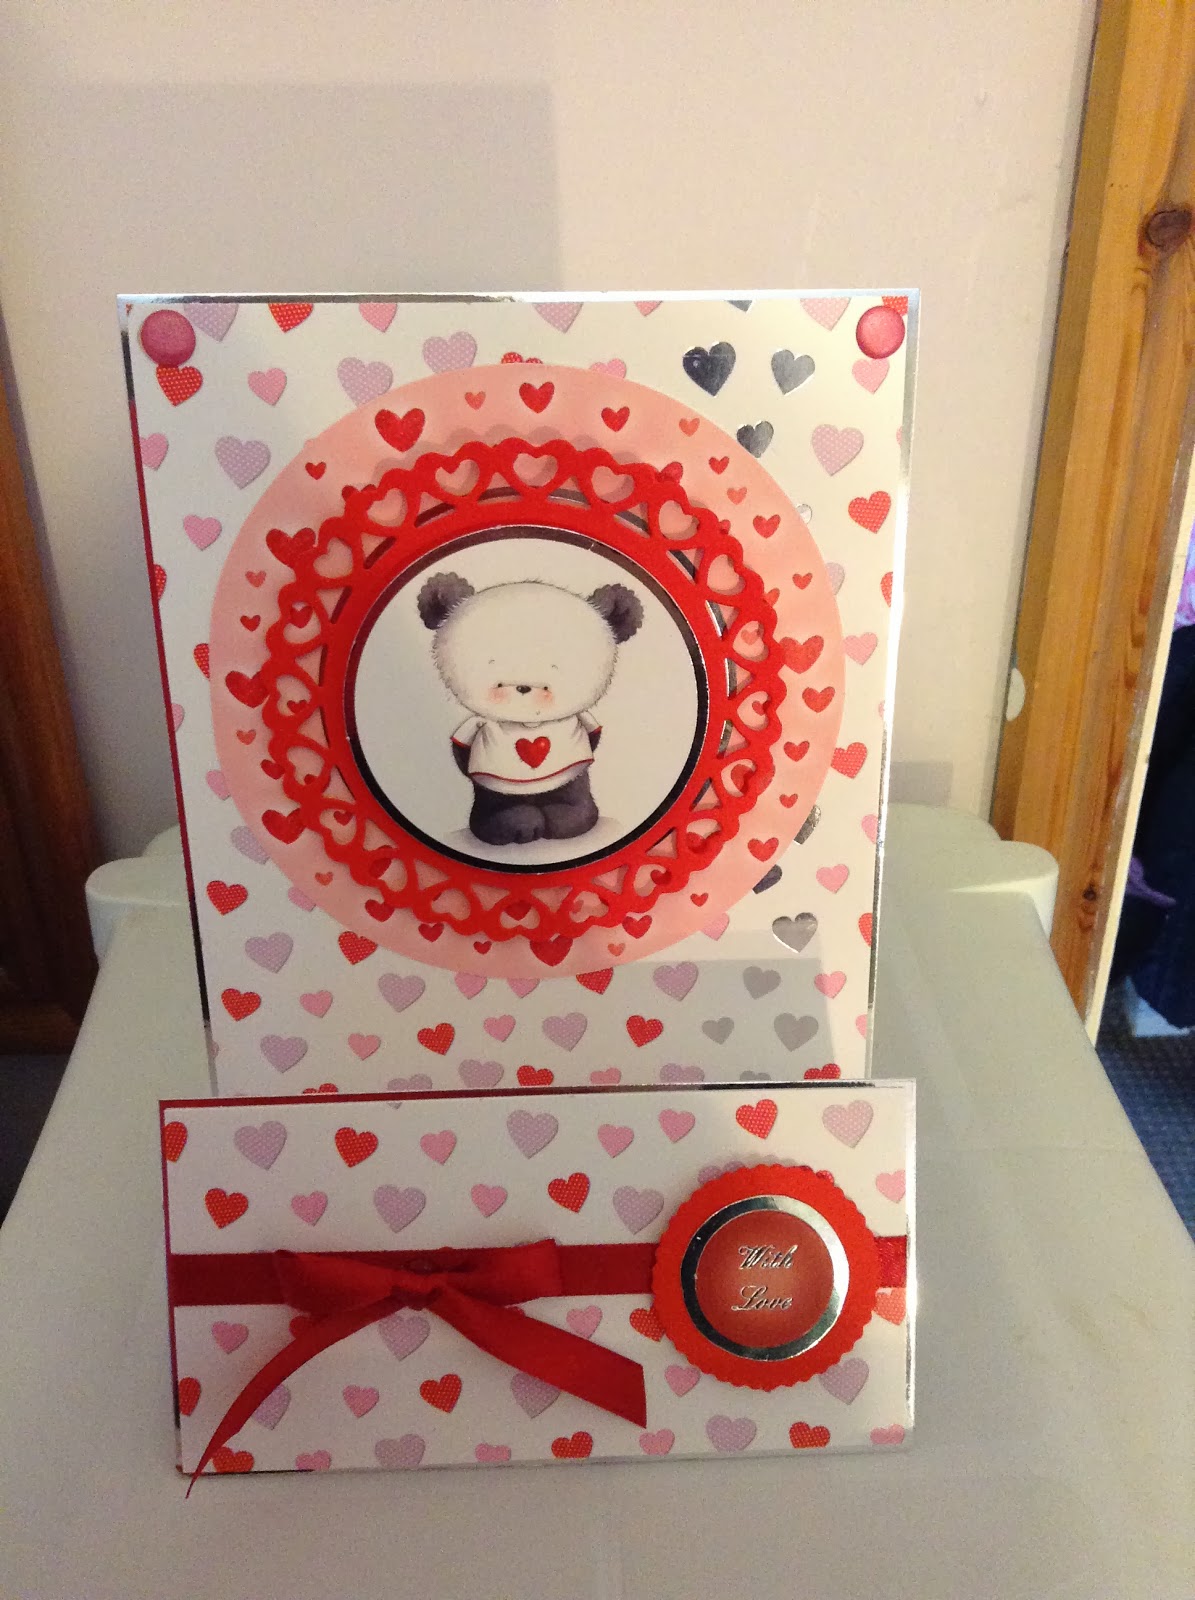
To make this card I started of with a 7"x7" card blank and covered the front in silver mirri, I then took a piece of pale pink adorable scorable a few millimetres smaller to the mirri and placed it on the mirri, I took some pink ribbon and wrapped it around so co- ordinations card stock and placed in on to the pink card stock. I took all four toppers and matted and layered them to the pale pink adorable scorable and silver mirri and placed them on the card leaving an equal border all the way round. I finished the card with a sentiment and bow and matching insert.
I think this has turned out well and I think it looks amazing in front of my marine tank x

Friday 21 February 2014

Be Bunni........

I absolutely love the way this turned out, what little girl wouldn't love this hanging in their room.

To make this frame I started of with the tonic picture frame, with co-ordinating card stock I cut four strips to size to place around the frame, inside the frame I got some pale pink adorable scorable and cut to size and place it on to some silver mirri and placed inside the frame, and added the topper with foam pads to the centre of the frame.
With some fuchsia pink card I used the Emily deco frame from tonic and placed on the frame, I finished this of with 6 10mm roses and a sentiment.
I think this is gorgeous and loved making it x

Crafters Companion Love and Romance.......


For this card I used 2 6"x6" card blanks and stuck them together, with my ultimate pro I scored both open sections from corner to corner and folded the back on them self's.
For the matting and layering in side the card I used the plain co-ordinating paper and matted it on to some silver mirri and placed inside the card with the sentiment reading " happy anniversary" from the kit, for the 2 outside triangles I used the foil co-ordinating paper from the paper pad.
I added to topper to the one of the triangles. I didn't have any purple roses so on a cream rose I coloured it in using a pro marker and then both roses finished with some spray and sparkle from crafters companion .
Something different to a normal card x

Crafters Companion Love and Romance 


To make this card I started of with an 8"x8" card blank
On a piece of gold mirri I matted a piece of co-ordinating paper from the all my love paper pad, I took a piece of the hearts acetate and cut it down the long side to 20cm, which would leave me a piece to wrap round the back of mirri I stuck it down to the card blank. I cut 3 gold strips measuring 2"x 20cm and cut 3 pieces of the matching cardstock just slightly smaller to the mirri and matted them together, I stuck the outside 2 right to the edges and the final piece in the very centre so it left an equal piece of acetate.
The frame I stuck it down flat at a crooked angle then stuck the topper down on foam pads
I finished the card with some large roses, a heart charm and matching insert
I think it turned out well x 

Thursday 20 February 2014

Party Paws by Crafters Companion


I love this cute panda, who would'nt!
For this card I started of making a a5 card that was landscape opening, for the step I scored on another piece of card at 1" 3" 5" the 1" section I added tape to and stuck in to the a5 card blank
I then Mat and layered it with co-ordinating card stuck.
In the kit it had some set piece cards but I wanted to try something different so I cut up one of the set piece cards so I could use it as a mat. With some red card stock I used my spellbinders heart circles die, I think this die worked will.
I added my topper to the card stock
I finished my card with some red ribbon and bow and sentiment 

I love how it all came together x

Monday 17 February 2014


My Craft Room

Here my pride and joy one of my favourite rooms in the house x


A New week...........

Well its a start of a new week, and its not raining ( for once) its the start of half term so i have all 3 children at home and as its not raining they have gone outside, cant remember the last time they were able to go out and play they better make the most of it.........i thought while they were outside i would have a clean up in my craft room ready to take pictures to put them on here, but that didn't happen (always the way) i ended up making a couple of cards using crafters companion party paws and crafters companions special birthdays, so i will just finish my coffee and go and clean the room so i can get some picture on here later..
catch up soon............

Crafters companion.....Special Birthdays

The Cute Little Teddy

I loved making this card and loved the finished product

i started with an a5 card blank and covered the front with gold mirri, i added the co-ordinating background card to some fuchsia pink card to make it stand out, i then added it to the gold mirri card leaving about a 2mm border all around.
For the flourishes i used the tonic die set called Frond Finesse, i stuck these to the back of the topper so it made it look like they were wrapped round. Then added the topper and happy birthday sentiment to the card and finished with using a tonic flower punch to make the flowers out of the fuchsia card stock and finished with a pink gem in each

Sunday 16 February 2014

Hunkydory Little Paws

 Cutest Kitties.......


7x7 card using one of hunkydorys latest kits

i started with a 7x7 card blank, i covered the front with a creamy coloured piece of adorable scorable.
i cut a 6" square of gold mirri and added a slightly smaller bit of card stock that came with the kit
added all of this to the centre of the card
added my chosen topper
and finished with a gorgeous bow
also added an insert to finish the card off

Sunday 2 February 2014

Hunkydory forever together

 Together Forever......


Here's a card I have made using hunkydory special moment kit
This card is 7"x7" I have matted the backing card onto gold mirri
I have the added a matching border and added to topper to it,
With the frame I added acetate the added foam pads to give dimension
Have added 2 sentiments and finished with some red flowers to add a splash of colour
A matching insert is added to the inside
I love the finish product

Contact Form

Name

Email *

Message *